Sunday, December 1, 2013

My FREE Coffee Table

Say what you will about Craigslist, but it is a miracle of modern thrifting. I've had many fabulous Craigslist finds, the most recent of which is this mission-style coffee table, which I scored for FREE. It was solid and in good shape...

...buuuuuut, mission-style just ain't my thang. So with a mallet and a saw and absolutely no idea what I was doing, I started demo.

I sawed off the decorative pieces on the legs and knocked out the thin supports on either end (they were not structural supports, just decorative.)

My pup waited patiently for me to take a break and throw the ball for her. :)

Once all the demo was done, my poor table was looking pretty rough. I patched all the holes and scrapes with wood filler and tried to ignore the nagging feeling that I had just murdred a perfectly good coffee table.


Then it was time for my favorite activity... sanding. I'll save you my bellyaching this time; if you poke around the blog a bit it won't take you long to figure out that I loathe sanding. But in this case it really did help smooth out all the damage I did with my little demolition derby. *Begrudging shrug and insolent eye-roll*


Finally, I primed with Kilz Original and painted with Valspar's Caribbean Walk-- my go-to paint for most of my little makeover projects these days. I also brushed on two layers of Minwax's polycrylic sealant to the table top, to protect it from damage and stains. 

Here it is, post-makeover:

You can kind of see from this side how the whole style of it looks different without the mission detailing.

I have one small complaint: there's a thin little trough-like thing all the way around the table, and it is a terrible crumb-catcher, and tricky to clean. And hell hath no fury like me when I'm slightly inconvenienced.

But other than that, I love this little guy. And it was free, free, free. :)

One more look:

Do you have any great freebie stories to share? Or Craigslist horror stories, for that matter?

<3 Cara

Friday, November 1, 2013

The Hutch

This is my treasure. I am absolutely obsessed with this hutch. I spotted it on Craigslist for $75 and drove out to a thrift store about 45 minutes away to pick it up. I had to borrow a friend's truck (and her daughter) to help me haul it back. The transformation took almost a year and a half, because I was only able to work on the hutch while I was on break from school.

Summer 2012: Buy it and start sanding

Christmas break 2012: sand (and sand and sand and sand...)

Spring break 2013: prime (and seek physical therapy for repetitive stress injuries caused by sanding)

Summer 2013: paint and seal

Fall 2013: move into new house and put this baby into action!

Here's what she looked like when I first picked her up:

I love the beautiful curves and the carved details, but the stained wood look isn't really my style. Oh, and the hardware...

Isn't that just precious? Barf. Time for an upgrade. 

I've seen several beautiful buffet and hutch re-dos on Pinterest, and was particularly inspired by this one from Pottery Barn:

But ain't nobody got $3,000 to spend on a hutch! So my mom and I armed ourselves with a hand sander and a vacuum, (and this excellent tutorial from Jamie at Southern Revivals) and stripped the hutch down to the bare wood. Here we are in action:


Don't let these glamour shots fool you. Getting through (what I can only assume was several layers of) the stain and down to the pine below was excruciating. I cannot stress this enough. Horrific. And once you strip it down to bare wood with an 80 grit sandpaper, you have to go over it all again with a finer sandpaper (I used 120 grit) to make it smooth. My arms hurt just thinking about it.

Here's the hutch with just bare wood. Isn't it pretty?! I love the carved details!

I used Kilz original primer and did one coat over the whole thing.

Then it was time to paint. I used exactly what Jamie recommended in her tutorial, Valspar's Carribbean Walk. I used about a quart and a half for the entire project, coating the entire hutch three times (I think. It's been a while.) I also added two layers of Minwax Polycrylic protective finish to all the top surfaces: the top of the base piece, and each shelf on the top piece. (I didn't feel that it was necessary to do it on all the surfaces. I used up maybe a third of the quart I bought, and have plenty left over for future projects.) The polycrylic helps protect the wood and paint from any chips or scrapes, and it doesn't yellow with time the way polyurethane does.

Then, FINALLY, the fun part! Reassembling everything, and adding new hardware! I bought cup pulls (similar to these) for the handles, in oil-rubbed bronze, and matching knobs for the doors below.

I couldn't find hinges that would work for the way the doors are cut, so I ended up just spray-painting the ones that came with it. I used Krylon's flat black, and they look just fine.

Here she is in all her glory:

I absolutely LOVE it! The paint color is just slightly more of a cream color than the white trim I have throughout my house, and I really like the subtle contrast. It also looks great decorating with bright white dishes and other decor.

I just think it's fantastic! It's definitely the centerpiece of the room, and my favorite part is telling people that I did it myself! Yay, me! *Brushes dirt off shoulder*

(Want to make your own sparkly ampersand? Read how I did it here.)

Estimated cost break-down:
Hutch: $75
Sand paper: $18
Primer: $15 (with plenty left over)
Paint: $36 (with about half a quart left over)
Sealer: $15 (with 2/3 of the quart left over)
Two cup pulls: $10
Two knobs: $4

Total cost: $173
Plus my right arm was super-toned (and tingly) for a while there, after all the sanding.

Let's look at that before and after one more time:
Woo hoo!

Thanks for visiting!
<3 Cara

Tuesday, August 20, 2013

Classroom Furniture Makeover


This summer I made-over two pieces of classroom furniture that, if they were human, would definitely have qualified for The Swan or some other horrifying plastic surgery show. Check out these uggos:
 

A $10 Craigslist easel (perfect for writing my daily morning messages that I learned about at a week-long Responsive Classroom training) and a filing cabinet that I had last year (it belongs to my school, but I got permission to paint it.)

The easel looked like it had been well-loved by some mini-Michelangelos.

Abstract and minimalist... I kinda don't get it.

One side has a whiteboard, and the other has a chalkboard. So handy! I actually ended up getting two this summer ($10 each, both from Craigslist). I'll use one for morning messages, and the other for the reading center.

This detailed and complex makeover consisted of... a can of Krylon's flat black spray paint. ...The end.


The filing cabinet is a behemoth of the workplace. Necessary, but hi. De. Ous.

I tried to remove the hardware from the drawers, but apparently you have to have a MENSA membership to do that, so I ended up just taping them off.

I also taped off the inside of the cabinet, where the drawers go, which ended up being rather unnecessary, as that part isn't visible when the drawers are in.

I used Krylon's global blue, because the color reminds me of the architecture of the Grecian coast. Love it!
 

The cabinet ended up requiring much more paint than I'd thought. I used six cans, I think.
 

Whoa.
The taping technique resulted in fairly clean lines. I'm satisfied. :)


Here's the final product. My color scheme in my classroom is blue and green this year (Seahawks, baby), so this will be perfect.

And here it is in the room, with the easel in the background. Check out my ratty old teacher's desk! I love it. It makes me feel like the latest in a long line of teachers who've sat at that desk.

Here's one more look at the before and after:


Yay! I love when everything's all shiny and new for back-to-school!
<3 Cara

Tuesday, July 9, 2013

Classroom Cuteness

Kiss me if I'm wrong about this, but aren't classroom bulletin boards thrilling?! I don't know about you, but nothing floats my boat quite like an elementary school bulletin board. The colored butcher paper, the little scalloped boarders, the punny titles... Whoo-ee!

Well if classroom decor is your cup of tea, grab a mug.


In the fall, our hallway theme was "Cara's Busy Bees". I had made the bees, so they were ready to go on the first day of class. The bodies are yellow and black card stock, the antennae and legs are black pipe cleaners, and the wings are waxed paper.


In the winter, each student's bee was replaced with a snowflake that they made themselves. I also made giant 3-D snowflakes that hung from the light fixtures in the room, so we had our own little winter wonderland.


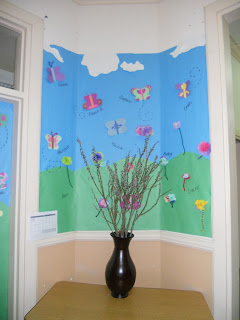
In the spring, each student made their own butterfly and tissue paper flower, which were displayed in the hall next to their name.


In our district the 100th day of school is in February, right around Valentine's Day, so this project was perfect. We brainstormed a big list of things that we love about our school, and then each kid had to select four of their own. They had to write them in complete sentences, have them approved by me, then rewrite them on a red heart. They were SO sweet, and kids from all over the school would stop and read them as they walked by. Awesome project!


We did an activity in class that asked kids to state a meaningful connection between themselves and a classmate. "We both like the color blue," was not sufficient; students were asked to think deeply and critically to find a significant connection. What they came up with was really beautiful. I wrote down the connections as they stated them, and then I created this display as a visual representation of the activity.


This board changed frequently throughout the year to display students' artwork. This was our study of Monet and Impressionism.


Posters I made describing the writing process.


Said is dead. We want Said to rest peacefully, so we brainstormed words we could use in Said's place. All the words under the headstone were brainstormed by my students, the little geniuses. :)


Measurement was a tough math unit. We created this bulletin board together, and had it posted in the room for easy reference.

We did a lot of work creating mental images for poetry, and writing poetry that evokes a specific mental image. Shel Silverstein is my hero.